
How Advanced PDF Editor Works on Mac?
Simplify PDF Editing on your Mac
Easily handle all your PDF needs. Edit & Convert PDF to MS Office formats, HTML and vice versa. Additionally, protect & redact documents using Advanced PDF Editor.
How to Use Advanced PDF Editor to Edit PDF Files?
PDFs are popular for their reliability, security, ease of sharing, and cross-device compatibility. Yet, editing them without a PDF editor on Mac isn’t easy. With Advanced PDF Editor, take full control of your PDFs. Edit text and images, secure documents, convert PDFs, add signatures, and more. Here’s how to get started and use this versatile tool.
Step 1: Download & Install Advanced PDF Editor
To get started, download Advanced PDF Editor on your Mac. Double-click the installation file and follow the on-screen instructions.
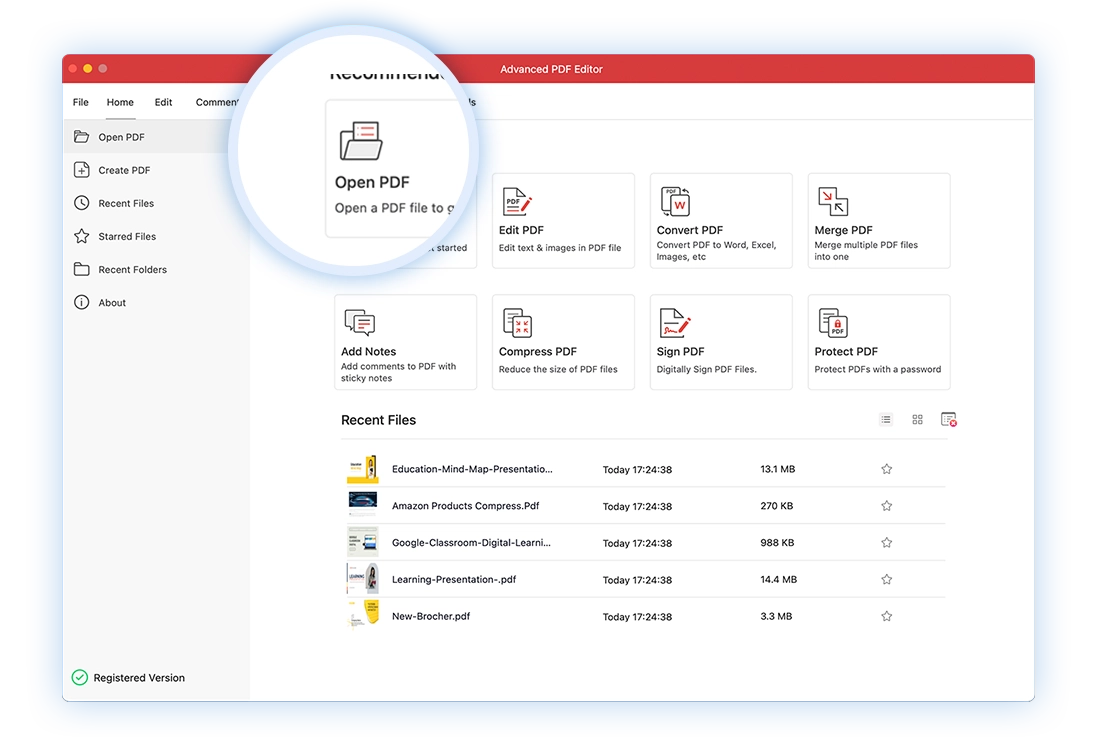
Step 2: Add a PDF File
Launch the app and add a PDF for editing. Use the Open PDF option > browse the file location, select it, and click Open. This will add the chosen PDF to Advanced PDF Editor.
Step 3: Start Editing
You will now see different editing options, such as Comment, Edit, Convert, Secure, View, Tools, etc. Select the one you need and start working on your PDF using Advanced PDF Editor.

Step 4: Customize Content
To change the text and images, click Edit and use different tools. Likewise, to digitally sign PDF, convert, merge, or create PDF, use the options accordingly. The toolbar offers different customization options.

Step 5: Save the Edited PDF File
Once the edits are done, save the new file. Click the File tab > select Save As > give a name to the PDF file and click Save. Confirm the changes by reopening the edited PDF.


All Done